

What to Check After a GTA Windstorm Hits Your Roof
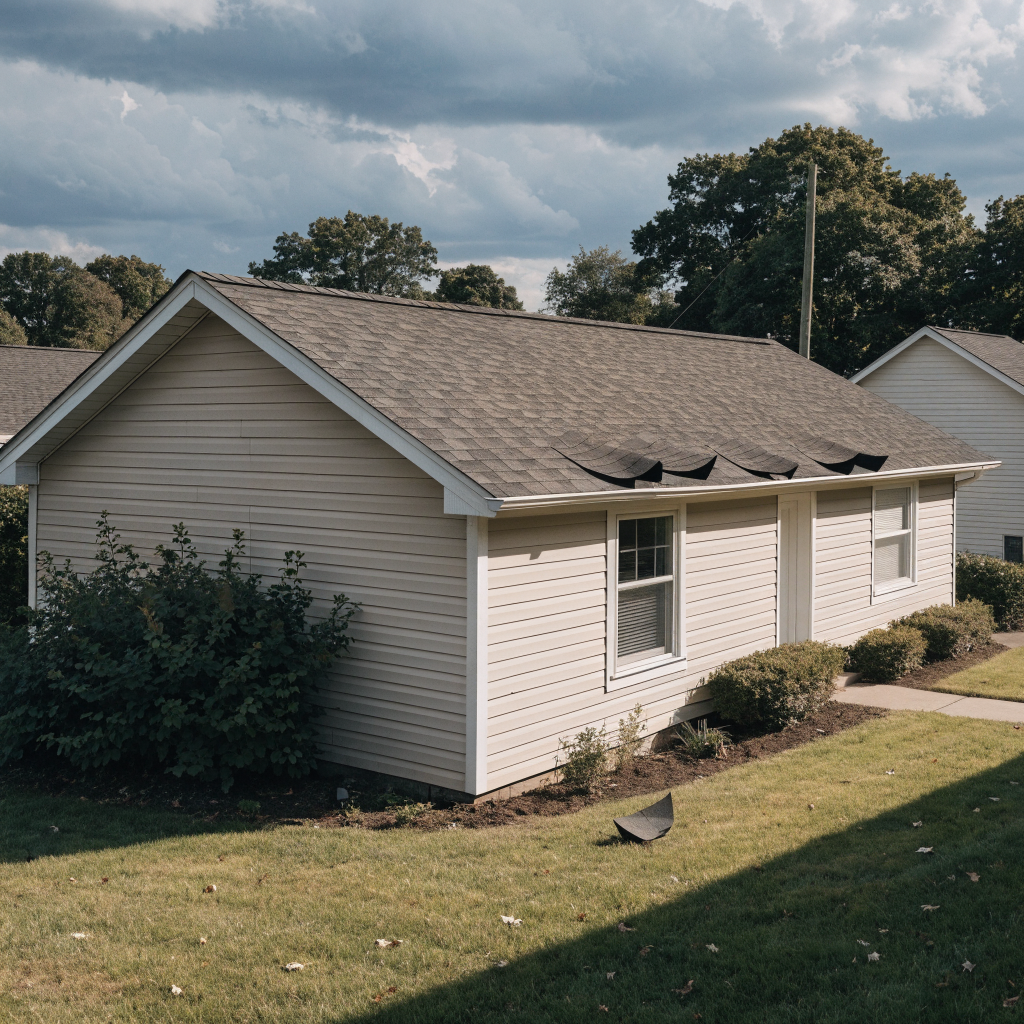
The calm after a windstorm can hide urgent roof damage. A roof inspection after a windstorm should look beyond missing shingles to lifted edges, shifted metal, punctures, and changes inside the attic. Early photographs also create a reliable record before the next rainfall alters the evidence.
Start with a safe ground-level review
Walk the property with binoculars and photograph slopes from several angles. Look for tabs that no longer lie flat, debris at valleys, metal pieces on the ground, or a ridge line that looks uneven. Do not climb onto a wet or windy roof.
Check the attic before the next rain
Use a flashlight to scan the underside of the deck, fasteners, insulation, and roof penetrations. Fresh moisture can appear as dark wood, damp insulation, a sharp odour, or a small reflective bead before a ceiling stain develops.
Separate storm damage from normal wear
A brittle shingle field may lose material because it was already near the end of its service life. A roofer should document what the storm changed and what was pre-existing so the repair recommendation remains credible.
Create a record for repair and insurance
Date-stamped photographs, the storm date, interior observations, and a written inspection help establish a clear timeline. If insurance may be involved, ask the insurer what evidence and emergency protection it requires before permanent work begins.
Decide what needs immediate protection
Loose material above an entrance, an active interior drip, displaced flashing, and an exposed deck do not carry the same urgency. Keep people away from fall zones and protect the interior before discussing appearance. A qualified roofer can then rank conditions as emergency, short-term repair, or monitored wear. Do not discard fallen pieces until they have been photographed and identified; a ridge cap or flashing fragment can point to a location that is difficult to see from the ground. If branches touched the roof, include puncture and structural clues in the review rather than focusing only on shingles.
GTA conditions for this roof
Wind behaves differently across the GTA. An exposed Brampton corner lot can take direct gusts, a Mississauga home near Lake Ontario may see wind-driven rain, and closely spaced Toronto houses may create turbulent pockets around ridges and dormers. The inspector should read the building’s height, orientation, nearby trees, and local debris pattern before deciding which slopes need close access.
Set the storm inspection record before repairs begin
Ask for a slope-by-slope record that separates new storm movement from ordinary ageing. The roof inspection after a windstorm should identify emergency protection, permanent repair locations, attic observations, and any area that could not be seen safely. If an insurance claim is possible, confirm the insurer’s documentation requirements before removing damaged material. The final proposal should connect each repair item to a photograph or measured condition, so there is no doubt about what the quoted price covers.
Practical planning checklist
- Keep people away from fallen branches or loose materials.
- Photograph the roof, attic, ceilings, and ground debris.
- Use temporary protection only when it can be installed safely.
- Book a qualified inspection if any edge or flashing moved.
The takeaway
Wind damage is easiest to address while the evidence is fresh and the interior is still dry. Preserve the storm date, photographs, and written findings rather than waiting for a ceiling stain. GTA homeowners who need a safe exterior and attic review can ask MLB Roofing to document the affected areas and recommend the next proportionate step.
