

Roof Valley Repairs: Why Small Details Control Heavy Water Flow
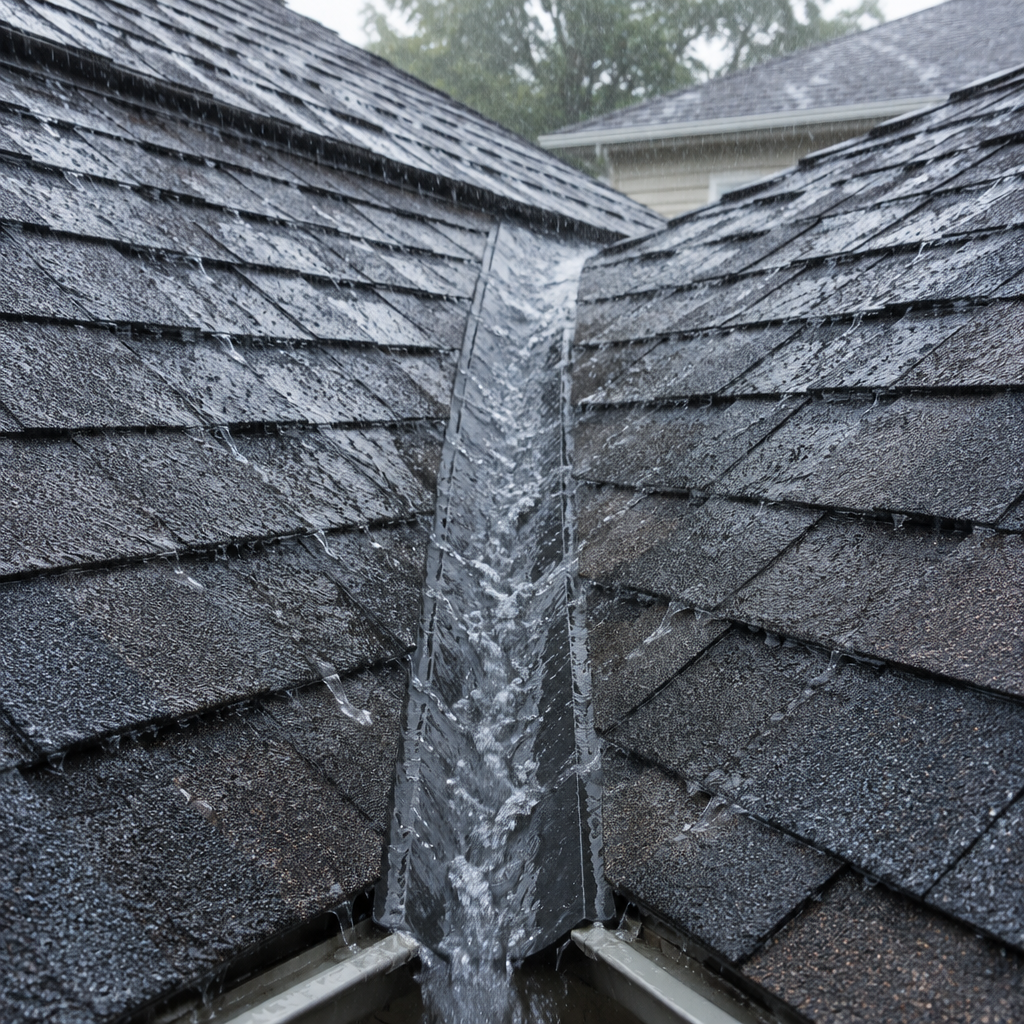
Two roof slopes can send a surprising volume of water through a valley only a few inches wide. A roof valley repair in the GTA has to restore that flow path, not merely cover the spot nearest an interior stain. The valley type, upslope details, shingle cuts, and fastener locations all shape the repair.
Identify the valley system
Open metal valleys, closed-cut valleys, and woven valleys handle shingles and water differently. A repair should match the intended system instead of layering sealant over a detail that was cut or fastened incorrectly.
Trace damage above the visible leak
Water can enter at a nail, lap, sidewall, or debris pocket and then travel along underlayment. Inspect upslope and at every nearby penetration before opening only the stained area.
Protect the channel from fasteners and cuts
Fasteners placed too close to the centre line can create direct entry points. Poorly trimmed shingles can also steer water sideways. The repair must restore both the waterproof layer and the water path.
Keep valleys clear after the repair
Leaves, needles, and granules slow drainage and hold moisture. A maintenance plan should include safe clearing, especially below taller trees and where two roof sections create a shallow valley.
Look beyond the lowest visible stain
Water can enter well above a valley leak and travel along underlayment or framing before appearing indoors. Check sidewalls, vents, upper roof discharges, and fasteners several feet upslope before cutting into the area nearest the ceiling mark. Valley repairs should not narrow the channel or create a new cross-seam in the busiest part of the flow. If the metal or membrane is opened, inspect the deck beneath and the transition at both ends. Debris patterns after a storm can also reveal where water slows, turns, or spills over a shingle edge.
GTA conditions for this roof
Brief GTA thunderstorms can fill a valley quickly, while maple leaves and winter grit can slow the same channel months later. On homes with additions, an upper slope may discharge into a short lower valley and concentrate the load further. A dry-day inspection should therefore consider the volume and direction of real storm runoff.
Define the valley system and its full drainage path
The quotation should name the existing valley as open metal, closed-cut, woven, or another documented detail. For a roof valley repair in the GTA, ask how far the crew will open the shingles, what condition would trigger replacement of underlayment or metal, and where new fasteners may be placed. Include disposal of trapped debris and photographs of concealed layers before they are covered. A controlled water check may help confirm drainage, provided it can be done without forcing water where rain would not travel.
Practical planning checklist
- Confirm whether the valley is open, closed-cut, or woven.
- Inspect several feet upslope from the stain.
- Document underlayment and metal condition when opened.
- Keep the finished flow path free of debris.
The takeaway
A valley succeeds when water can move freely from its upper entry points to the eaves without meeting an exposed nail or sideways shingle cut. Judge the repair by that complete route. MLB Roofing can assess leaking or debris-prone valleys on GTA homes and price the detail that the existing valley system actually requires.
